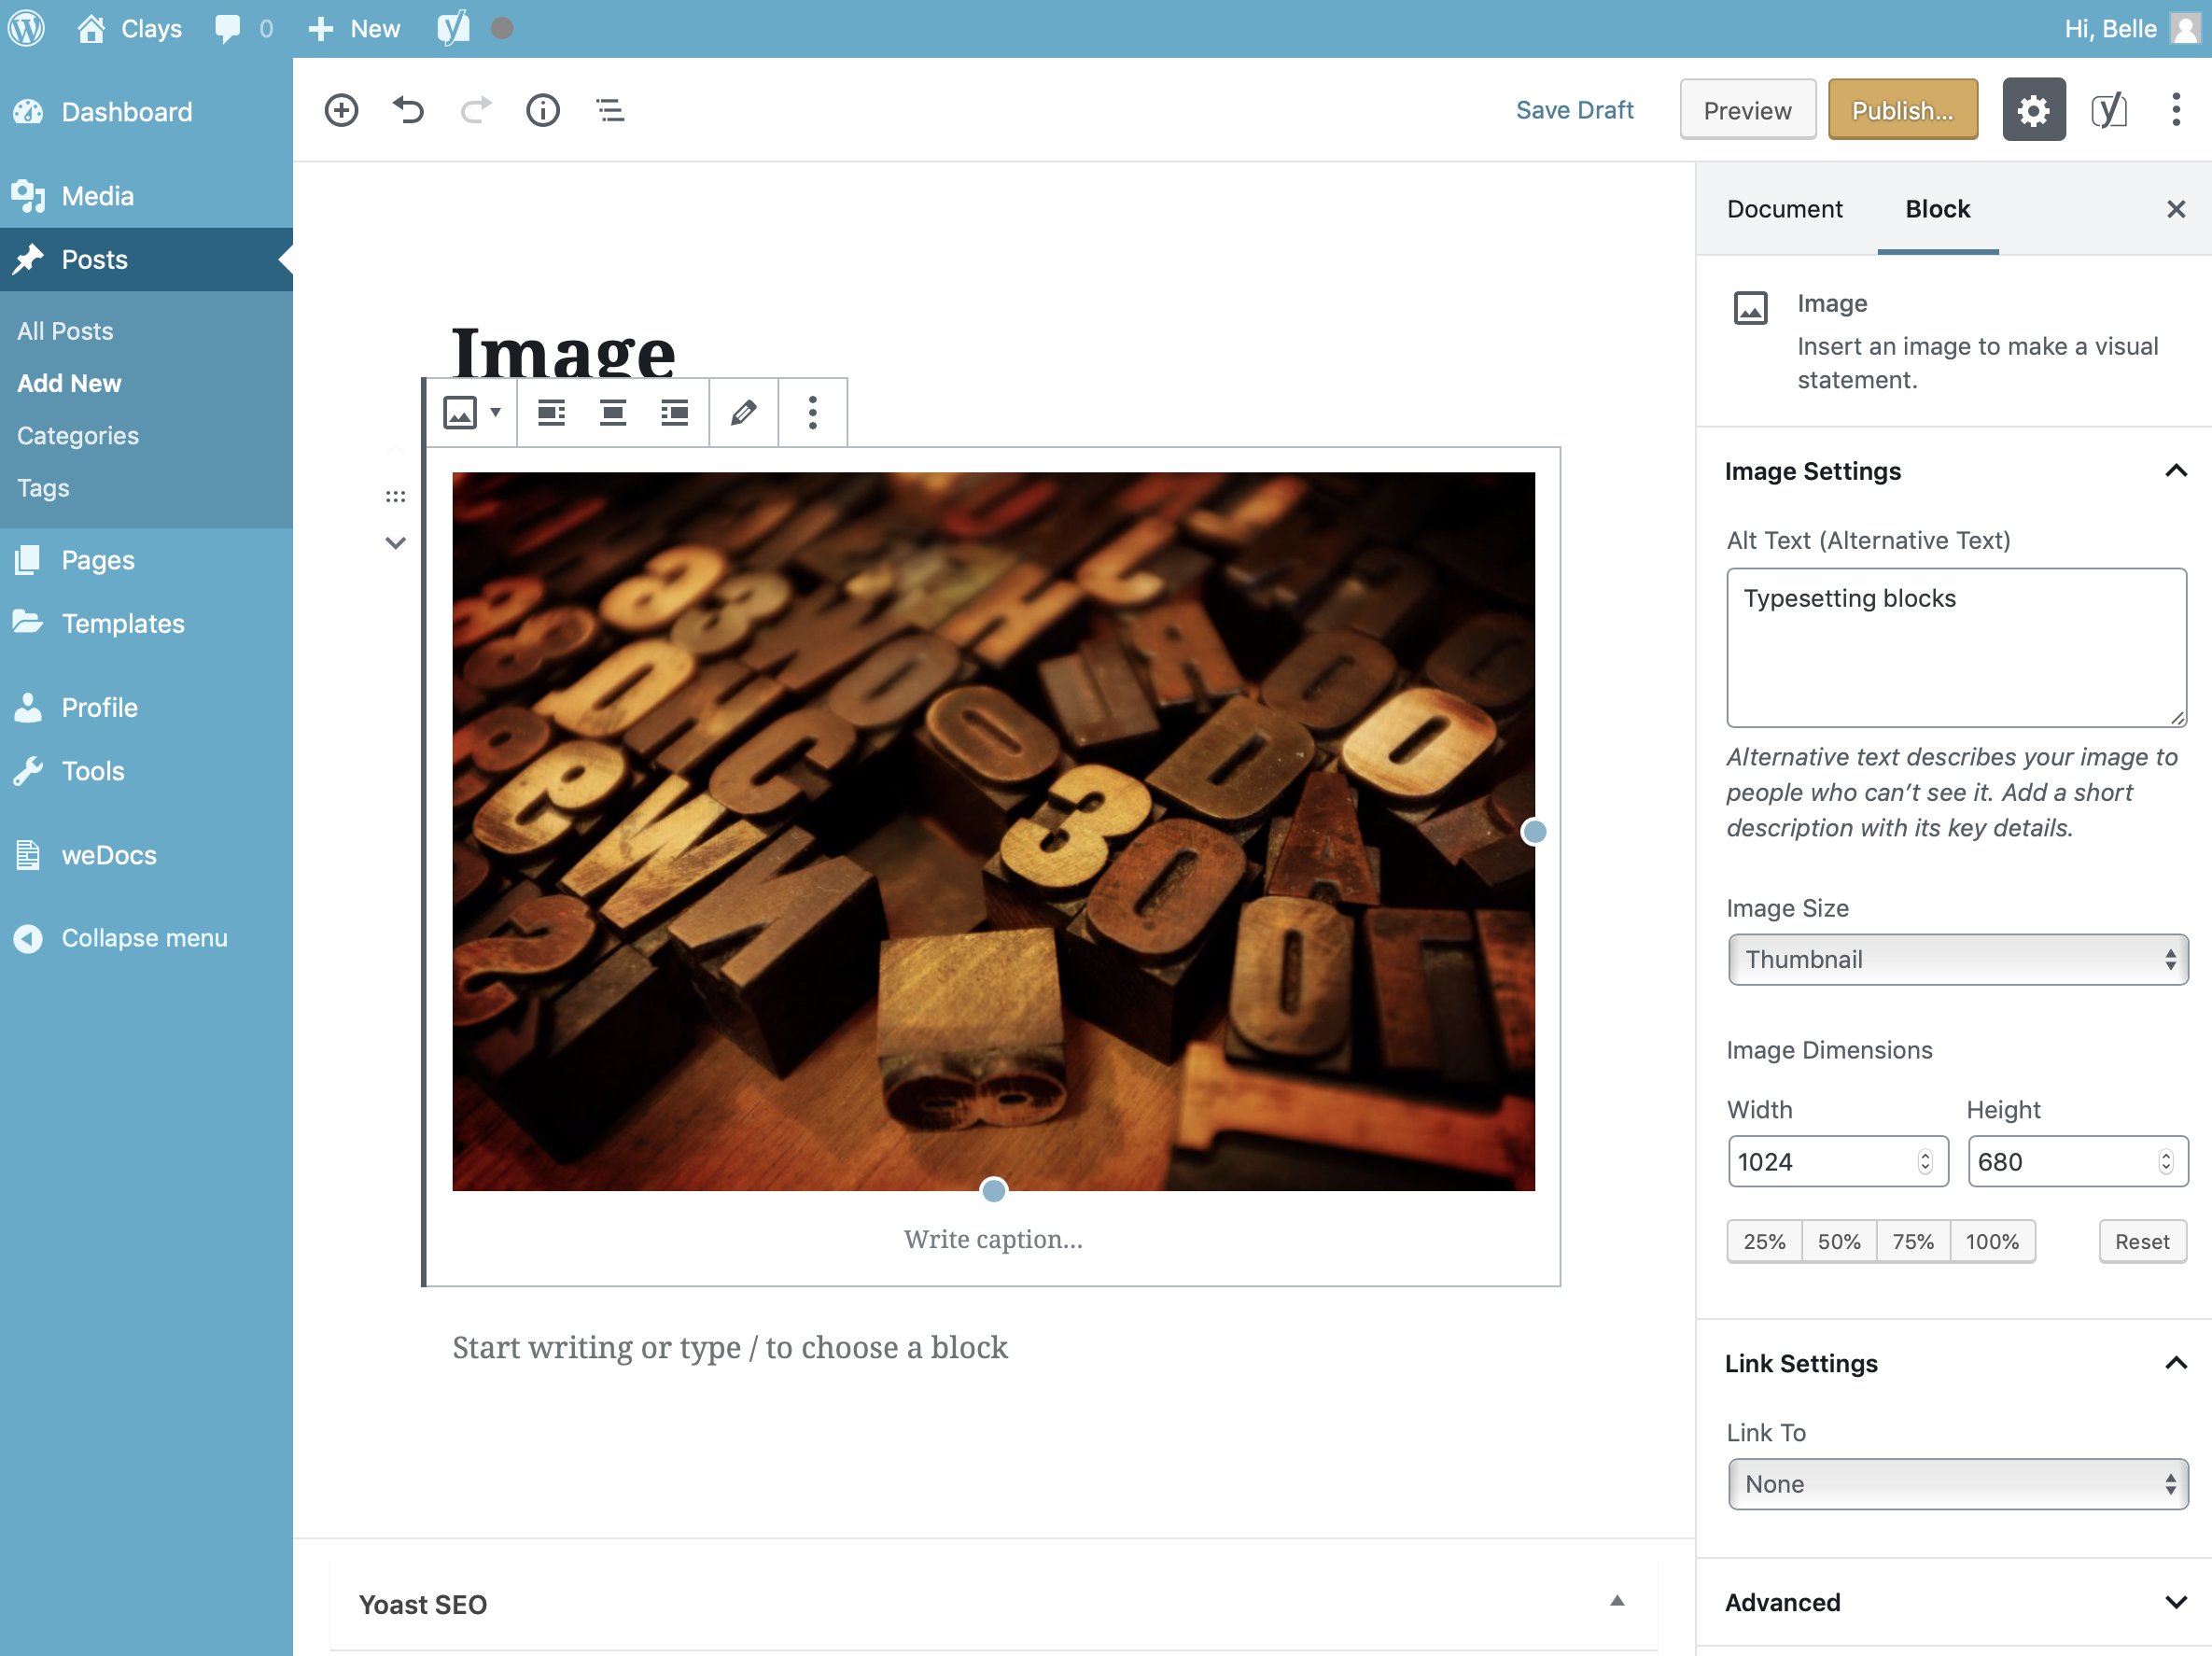
The Image Block allows you to add an image to your content. After inserting the Image Block, click the Upload button to upload an image to your media library or click the Media Library button to show your media library and select an existing file that you’ve uploaded previously. Alternatively, click the Insert from URL button to enter the URL of the image you would like to display. You can also drag ’n drop your image onto the Image Block and it will be automatically uploaded to the Media Library and inserted into the Block.
Once you’ve added your image to your block, there are further options available in the Settings Sidebar.
Alternative Text can be added to your image using the Alt Text field. You can also choose to link the image to the media file itself, link to the WordPress attachment page for that file, or enter in a custom URL for the link using the Link To Dropdown field. You can also select ‘None’ if you don’t want your image to have a link.
If you want to change the size of your image, there are a number of ways to do it. You can use the Width and Height fields to set the exact pixel width of your image, or you can use the percentage buttons (e.g. 25%, 50%, 75%, 100%) to change the width accordingly. Alternatively, you can also select the size from the Image Size dropdown field.
You can also change the size of the image using the drag handles on the image itself, within the block. Simply position your cursor over one of the blue dots that appears on the edge of the image and then click and drag the image to the size that you want.
When resizing your images, it’s always best to only reduce the size, and not enlarge. If you add a small image to your block, and then increase the size, the image will become pixelated and wont appear crisp when viewing your page.
To display a text caption below your image, click in the Write caption… section just below the image and type in your caption.
